Glucosense Membrane Mounting and Dismounting Instructions
Hamilton’s GlucoSense sensor is designed for reliable, real-time, in-situ glucose monitoring in bioprocessing R&D. To ensure accurate measurement performance across batches, correct handling of the GlucoSense membrane is essential.

Mounting the GlucoSense Membrane
Properly mounting the membrane ensures consistent measurement performance and supports sterile workflows.
Wetting the surface: Before mounting, it is mandatory to cover the sensing element with deionized water and, in parallel, wet the GlucoSense membrane itself with deionized water.
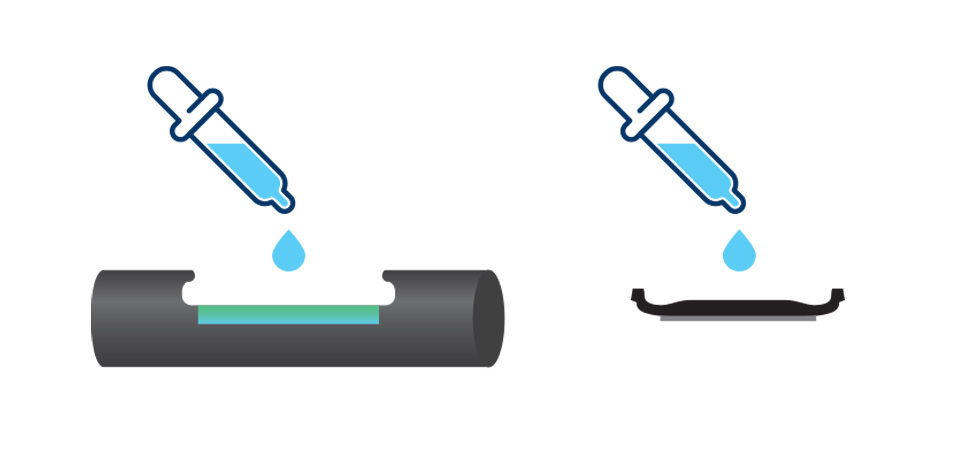
Clip the membrane:
- Place the GlucoSense sensor on a flat, horizontal surface with the membrane slot facing up.
- Position the GlucoSense membrane in the designated slot on the sensor shaft.
- Ensure the membrane sits flat without tension or folding.
- Apply gentle downward pressure.
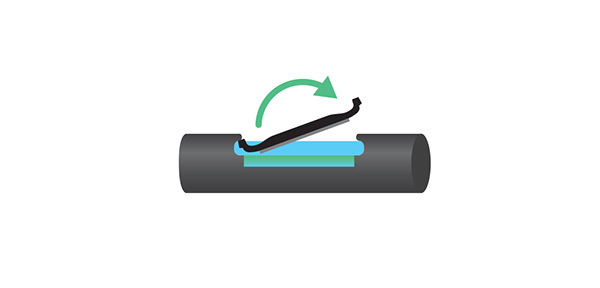
Confirmation: The sensor is ready when a "click" is heard.
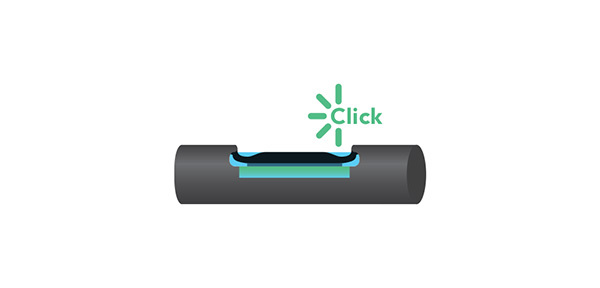
- Inspection: Please verify that
- The membrane is correctly mounted.
- No air bubbles are trapped under the membrane.
- No gaps are visible between the membrane and the sensor.
- Autoclavation: Please ensure that
- Each newly mounted membrane may undergo only one autoclave cycle with the sensor before the process run. The sensor itself is reusable, and can be autoclaved again with a new membrane for subsequent runs.
Your sensor is now ready for installation in the bioreactor.
Please keep the sensor wet until it is installed in the bioreactor, and do not allow the membrane to dry at any time. Immediately after installing the GlucoSense membrane on the GlucoSense Sensor, immerse the sensing element with the membrane in deionized water, medium, or saline solution to prevent the membrane from drying. See our detailed video on how to verify your GlucoSense sensor.
/
Dismounting the GlucoSense Membrane
The membrane is designed to be easily dismounted after a bioprocess run.
- Sensor placement: Place the GlucoSense Sensor on a flat, horizontal surface with the membrane facing up.
- Remove the GlucoSense Membrane:
- Make sure to position the GlucoSense Membrane Tool over the membrane at a 90° angle, so that the arrows on the sides of the tool point toward the sensor head.
- Gently squeeze the sides of the GlucoSense Membrane Tool to release the Membrane from the slot on the sensor shaft.
Lift the membrane straight off the sensing element, avoiding scratching or twisting the optical surface.
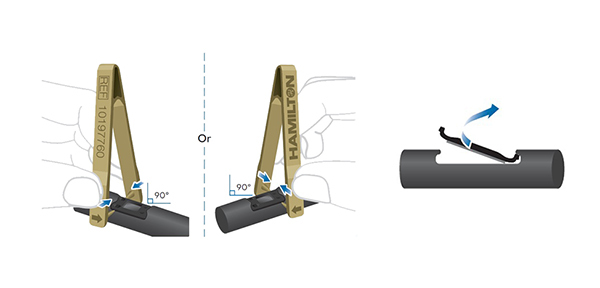
- Disposal and cleaning: After dismounting the membrane assembly, the membrane should be disposed of, and the sensor should be manually cleaned.
/
Notes & Best Practices
- Always use a new membrane for each bioprocess run.
- The membrane and sensor must remain fully wetted for accurate measurement and to meet the specified autoclave compatibility.
- If air bubbles are visible behind the membrane, repeat the wetting step before starting the run.